Jordan Fisher – Outdoor Women’s Alliance
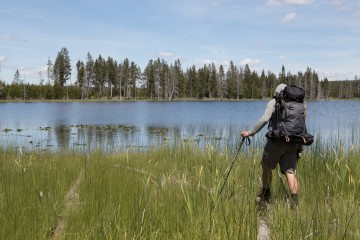
Women who head into the backcountry alone hear the gamut of doubt from outsiders. Although solo backpacking has recently gained traction in the mainstream, it can be hard to escape comments that their solo sojourns are unwise.
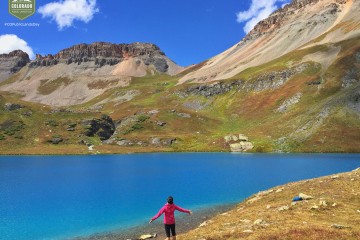
Solo travel is empowering. As outdoor women, backpacking solo is one of the most liberating things we can do. Through it, we learn that we are capable of taking on unknowns and enjoying solitude.

But whether a woman has backpacked solo dozens of times or is setting out on her first trek, planning for safety is key—and with solo endeavors, safety is equivalent to self-reliance.
During the planning process, think about skills in which you lack proficiency and take the time to hone them. For instance, I want to become a bear-bag-hanging ninja. Others may want to understand wilderness medicine or improve their campstove cooking. Identify and practice those skills while out on a few solo day hikes; these outings will also double with helping you get mentally secure in being alone.
The following are some common sources of anxiety experienced by those who head into the woods alone. Preparing yourself both mentally and tactically for some of these situations will help ease fears you may have and allow you to enjoy your experience for what it is: an adventure in nature.
Animals
Animal encounters
Make sure to check on animal activity in the area in which you’re hiking and camping. This will likely change from season to season, so get the latest information. If you’re in bear territory, make sure to pack bear spray and call out or sing from time to time. The human voice has proven more effective than bear bells—which are often too quiet to be heard at any distance—in warning wildlife of your presence and keeping them clear of your path. REI has a great breakdown of how to avoid bears while hiking and what to do if you encounter one.

Food storage
Animals, similar to humans, love food and will stuff themselves on delicious things—like whatever’s in your pack. Since your food supplies will already be minimal in the backcountry, you’re not going to want to share with any critters.
-
- A general note on storage: Anything with a fragrance (toothpaste, sunscreen, soap, etc.) and anything that has come into contact with food (like your cookware) should go into a campsite locker, a bear canister, or your bear bag.
- Metal lockers: If you’re on a national trail, at a known campsite, or in a national park, check to see if metal lockers are provided. If so, you may not need to worry about packing bear-safe storage.
- Bear bags and canisters: If metal lockers are not provided—which will more than likely be the case—you’ll need to stock up on some gear. Bear canisters or bags are an option (be sure to check if they are required at the places you intend to camp beforehand). Otherwise, it’s ninja time: you’ll need to practice hanging your food high up in a tree. Find a sturdy branch, tie a rope or paracord to a small stuff sack full of rocks or a larger rock then throw it over said branch. Once the rope is back on the ground, attach your food bag and hoist it up using the loose end of rope. Also, remember to always form a triangle (a la “Bear-muda Triangle”) at camp: put at least 200 feet between your tent, bear bag, and kitchen area.

Gear
A good knife
This is the staple of camp life. Look for a knife with a 2-4 inch blade that can fold for smaller storage as well as clip to your pants for easy access. Once you find the right one, it may become your camping soulmate.
Locator
Although pricey, these can give you (and your friends and family) peace of mind while you’re in the backcountry.
Whistle
Easy, cheap, and attaches right to your pack.
Duct tape
You never know what you might need it for but it always finds a way of being handy. Tip: Roll a long strip around your water bottle or another hard, plastic surface to shave weight.
Trash bags
Bring a few just in case. Like duct tape, they’ll come in handy (such as a quick rain cover).
Redundant fire sources
Wet firestarters are the worst when you’re backpacking. Bring extra fire supplies, whether it’s matches in a waterproof box, an extra lighter, or multiple sets of your preferred fire starters.

First Aid
Standard first aid kit
A bigger kit isn’t necessarily better unless you know how to use each item. Learn at least the basics and prep it with extra supplies based on your needs. Are your boots newer and causing hot spots? Bring blister care. Anticipating logging 10-plus mile days with a 30 to 40 pound pack? Bring ibuprofen. If you’re going to be in alpine conditions, check to see if your kit comes with a space blanket. If not, consider packing one as an extra precaution. Whatever you have in your kit, make sure you always have it handy.
Hydration
Plan your water intake for the duration of your trip. This includes not just drinking water, but what you need to cook and clean with. Pre-trip, locate natural water sources along your trail, verify their availability (as these can change seasonally, especially in drier regions), and mark them on your map. Purchase a water purifying system, bring a redundant water purifying system—like iodine tablets—just in case. Also, consider packing electrolyte replacements.
Online prep courses
Learn as much as you can about common backcountry ailments and how to treat them in advance. Here are some great resources:
- Backcountry First Aid Cheat Sheet
- Backcountry First Aid Primer
- How to Prevent 10 Common Hiking Injuries
- How to Treat the 6 Most Common Injuries in the Backcountry
Wilderness Medicine
Find a NOLS certification class nearby and sign up before you go. The basic Wilderness First Aid course is a two-day intensive class that teaches you everything from bandaging minor scrapes to splinting fractures. This is a must for anyone seriously considering solo jaunts.

Navigation
Get schooled
Take a navigation course before you go. Make sure you’re a map-reading wizard and can use a compass like nobody’s business.
GPS and/or a compass
Bonus points if you can use both.
Paper Map
Don’t rely on your phone. You could lose battery power, smash your phone on a rock, drop it in the water, lose GPS service in the backcountry, or your app could go haywire. Don’t expect cairns to be your route-finding safety net when you’re miles in and exhausted. Get a weather-proof map and learn how to use it.
Last but most definitely not least:
- Always tell a friend or family member where you’ll be heading. Give them the trail info and let them know when you plan to be back within cell range to give them a call. You can also call the local park or forest service headquarters to let them know where you’re going and when and how long you plan to be there.
- Make sure you have a solid understanding of Leave No Trace principles (LNT) so you are minimizing your impact on natural spaces. Take the organization’s Leave No Trace Online Awareness Course or find an in-person course near you.
- Check to see if the area you’re trekking into requires overnight permits and don’t ignore getting one if so. Not only is it the law, it also helps officials know you’re there in case of an emergency. If there is no permit structure in place, call the trail operator (e.g. local U.S. Forest Service office) in advance and sign in at the trailhead.

Solo adventure is worth it. It is normal to have trepidation at first, but careful planning, an understanding of what you need, and a few practice runs prior to longer solo treks will help you feel confident in the wilderness.
With preparation, the rewards are far more common than the risks. Happy prepping and happy trails.
