3 Great Backcountry Trips for Beginners
August 6, 2018
3 Great Backcountry Trips for Beginners
(+ Rookie Mistakes You Should Probably Avoid)
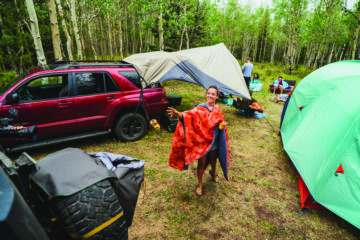
There are some people out there (no naming names), who really hardcore about backpacking: they cut weight by shaving their toothbrushes down to a nub, or wearing the same socks for 10 days straight. If your idea of packing light is bringing a sixer instead of a 12-pack, you either have very different (and perhaps better) priorities, or you’re a backpacking beginner. Either way, congratulations! The world needs more people like you.
Fortunately, there are still zillions of backpacking trips that are perfectly suitable for beginners, featuring not-too-challenging hikes with breathtaking vistas and accessible campsites. Here are three backcountry trips we like an awful lot, with some basic stats and survival tips to ensure you make it back in one piece.
OUZEL LAKE, Rocky Mountain National Park, CO
Distance: 20 miles RT
Difficulty: Moderate
Permit Availability: Good
We’ll start in our own backyard, because we’re lucky enough to live and work just a stone’s throw from Rocky Mountain National Park. Spanning a whopping 265,769 acres, RMNP is one of the largest in the U.S., and understandably one of the most popular backpacking destinations in the country. To minimize impact from nearly three million annual visitors, the park limits backcountry permits; high-traffic areas are likely to run out of permits in the summer, so make sure yours is secured before you book any travel.

We chose the Ouzel Lake hike, in part, because it’s a bit off the beaten path—so you’re less likely to deal with crowds, and more likely to secure a permit. You’ll start at the Wild Basin trailhead, in the southeast corner of the park; it’s located between Estes Park and Allenspark on Colorado Highway 7. Though the hike is only 10 miles one way, it starts at an altitude of 8,566 and tops out at more than 10K. Once you reach the summit, you’ll be hard pressed to tell whether the view or the altitude is making you dizzy.
Bonus option: Looking for something shorter? Try Lost Lake in Indian Peaks Wilderness. It’s a 4.1 mile RT hike in from the Hessie Trailhead, with designated campsites at at the lake and outdoor serenity built right in.

Lost Lake Views
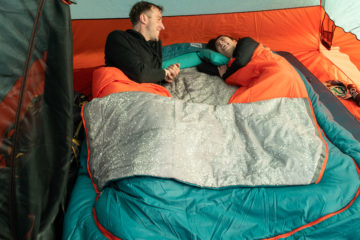
BRING: Even in the summer, evening temps in the upper elevations of RMNP can be frigid—
and mornings can be dewy. Our Sine 20° DriDown™ Sleeping Bag will keep you warm and dry.
DO: Split your trek. Though the lake itself is quite stunning, the hike there isn’t exactly ugly; there are multiple campsites along the way to help you minimize same-day elevation gain.
DON’T: F*ck around with altitude. It’s like gravity: fail to respect it, and it will absolutely ruin your trip. If you’re a salty sea-level type, consider spending a few days in Boulder to acclimate.
NO REALLY, DON’T: Overpack. Start with your “big 3”: shelter, backpack and sleeping bag. Keep these under 5–6 pounds total, and you’ll have a nice light foundation for the rest of your beer…er…gear.
West Rim Trail, Zion National Park, UT
Distance: 14 miles one way w/shuttle
Difficulty: Easy
Permit Availability: Good
For sheer otherworldly beauty, Zion National Park is absolutely tops—SO tops, in fact, that the incredible West Rim Trail is often overshadowed by its showier, more-popular sibling, The Narrows. But even if this isn’t your first backcountry trip, you’ll be glad you skipped the crowds and secured a campsite.

Your trek begins on a plateau surrounded by white-veined canyons and verdant mesas, before plummeting more than 2,500 feet over the five-mile journey into a labyrinth of vibrant geological wonders. Fun fact: The Zion, Bryce and Grand Canyons are all part of the same massive rock formation; Bryce’s bottom later is Zion’s top layer, and Zion’s bottom layer is the Grand Canyon’s top.
BRING: With a comfy Kinesis™ Hipbelt, top-loading functionality, an external hydration sleeve and a handy “shove it” pocket, our trail-tested Revol 65 backpack carries up to 50 pounds.
DO: Stay overnight! After soaking in the incomparable morning light, add the half-mile spur to Angels Landing (one of the most iconic vistas in the entire National Park System) before packing out.
DON’T: Be tempted to do this as a day hike. Yes, it’s totally possible for most fit folks—there’s a shuttle bus in Springdale—but you’ll forfeit your chance to see the canyon at dusk and dawn.
NO REALLY, DON’T: Be lax about hydration. Water is both the heaviest thing you’ll carry, and your single most important survival tool. Have a solid plan—and an even more solid backup.

Angel’s Landing does not disappoint.
Gunsight Pass, Glacier National Park, MT
Distance: 20 miles one way w/shuttle
Difficulty: Moderate
Permit Availability: Good
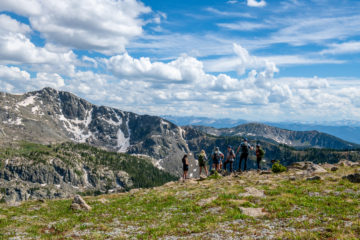
Glacier National Park is a backpacking mecca for ALL levels. More than 700 miles of varied trail types traverse a million acres of jaw-dropping wilderness, much of it remote, rugged terrain that crosses over with grizzly habitat. However, tucked away amongst all the expert-level options is one not-to-be-missed beginner trip: Gunsight Pass Trail to McDonald Lake Lodge.
This moderate 20-mile trek begins and ends on the world-famous Going-to-the-Sun road; shuttle service between the two trailheads means you can hike the full 40-mile loop, or spread the 20-mile trek over a few days. The hike also takes in some of the park’s most spectacular scenery—including the Blackfoot Glacier and loads of waterfalls—with gorgeous backcountry camping options at Lake Ellen Wilson.
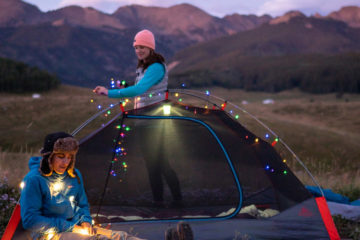
BRING: Our award-winning TN2 tent is a favorite with backpackers and gear editors alike, and here’s why: it’s compact, light and easy to set up, without sacrificing interior space or comfort.
DO: Add a spur. The optional 7.4-mile side loop to Sperry Glacier ascends over a rocky moonscape before passing through a tight notch to a glacial overlook where mountain goat sightings are likely.
DON’T: Flub your route. Glacier regulars recommend making your route run from east to west, rather than the opposite; this avoids a quad-busting ascent from Lake McDonald on day one.
NO REALLY, DON’T: Blow off navigation. If you’re hiking in the backcountry—even if you’re following a trail and using a map—you should know how to use a compass and signal for help.

The TN2 Tent PC: @thebeansandrice_
For more Built for Play fun, follow @keltybuilt on Facebook & Instagram.
Photos by @twm_photo